Monday August 17, 2015 at 10:20am
There are many CAD and CAM packages out there, however there are many disadvantages of having separate software for CAD and CAM. Some CAM packages require an export from Solidworks into another format the CAM will understand.
There are many CAD and CAM packages out there, however there are many disadvantages of having separate software for CAD and CAM. Some CAM packages require an export from SOLIDWORKS into another format the CAM will understand. So on the more complex 3d components, surface data may suffer from translation issues between CAD and CAM packages. Also there is the small issue that you would have to learn 2 packages rather than potentially 1 if the CAM is integrated into the CAD platform.
Major benefits of having a CAM software that is integrated into SOLIDWORKS (Solidcam) are that potentially if the model changes there is no requirement to start the CAM work from scratch, a simple re-synchronisation can be performed for toolpaths to associate themselves to the new model. It is also capability of switching from design to manufacture with a click of a button if internal CAM data was to be created.
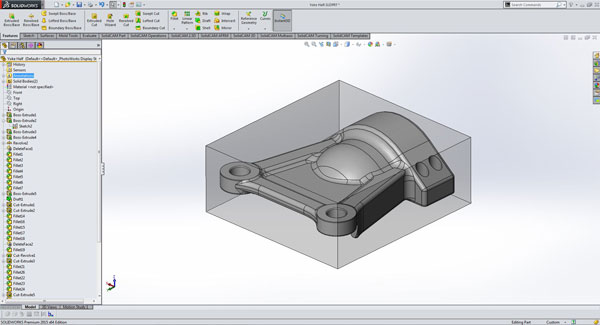
We will start with a component that has already been modelled which also has a further block around the component indicating what the material is required to start the machining process.


With Solidcam being an integrated CAM package, it is simply just another add in to SOLIDWORKS. From the tools drop down we can create a new manufacturing process (milling, turning, mill-turn, wire EDM).

From there it is a very similar layout to how you normally see SOLIDWORKS in the design environment, giving a new user who is familiar with SOLIDWORKS a good start in knowing the basic functionality already.
As soon as the fundamental information is setup, SOLIDWORKS will now be in assembly mode, this gives the added benefit that jigs or fixtures can be added and mated to the component like any standard SOLIDWORKS assembly.

Toolpaths can now be created upon this, the power being that they are associated to the model. In the 2 instances below the user can control the toolpath in respect to z-limits by clicking on vertices or perpendicular faces to the z axis. Another option on holes is the select the holes by their feature in the SOLIDWORKS feature tree. Because it was modelled in SOLIDWORKS, it gives the user the capability to take advantage of that.


Once adequate toolpaths are created, they are visible on the SOLIDWORKS screen overlaying on the design model.

Toolpaths can also be potentially simulated on their machine tool to give the programmer feedback as to if the toolpath is going to machine safely without any collisions.

So at the beginning we talked about if the design was changed as from time to time design changes do happen and they can happen at any stage, if the programmer has already started programming their particular job and spent valuable time before the change happened the last thing he wants to hear is that there has been a design alteration.
With the benefit that was mentioned at the start we can simply make the design change and let that flow into the CAM data, potentially save us a lot of work re-programming from the start. The next few steps will take us through this procedure. First the designer would potentially make his changes, in this example we will change the following dimension from 160mm to 200mm


The part has become visibly longer! The modified part would then be saved and the CAM programmer can then re-open the SOLIDWORKS model. The following message will then be displayed.

No matter how drastic the change is, it could be a subtle change of size on a single radius to a complete design change. The following prompt will be displayed, we will accept the following message and potentially our changes will have been made automatically.

From here we could then g-code out to the machine and run the created programs.
By Stephen Abbott
Applications Engineer
Solid Solutions Management